Book a FREE Trial
See why Code Galaxy is the #1 online coding
school of choice for students & parents.
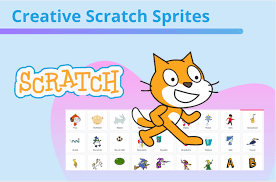
In the digital realm of Scratch, the term “sprite” takes on a special meaning. More than just a term or a name, sprites are the heart and soul of every Scratch project. They are the interactive elements, the characters, or objects that users can program to move, animate, and interact within their Scratch projects. Whether it’s an animated animal, a moving car, or even a talking piece of fruit, sprites are where the action happens in Scratch.
Born out of the imaginative labs of the Lifelong Kindergarten Group at MIT, Scratch is a free, web-based platform that offers an initial plunge into the world of programming, especially catering to young learners. By emphasizing a visual programming environment, Scratch eliminates the intricacies of traditional coding syntax. Instead of typing out lines of code, users utilize drag-and-drop blocks to bring their ideas to life. This not only makes coding more approachable but also more engaging, especially for those who are just starting out.
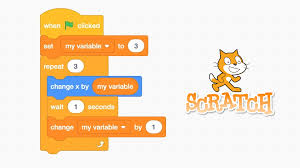
Let’s break down each category of blocks used in Scratch to code a sprite, in a simple, step-by-step manner:
These blocks are used to control the movement of your sprite. You can make the sprite move forward, turn, and change position.
How to Use:
Drag a Motion Block: For instance, “move 10 steps” to move the sprite forward.
Change Values: You can modify the number of steps or degrees to turn.
Combine Blocks: Snap multiple motion blocks together for complex movements.
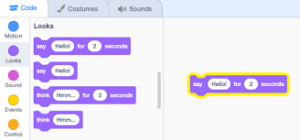
Looks blocks change how your sprite appears on the screen. You can change costumes, sizes, or even make the sprite say something.
How to Use:
Select a Looks Block: Like “change size by 10%” to make your sprite bigger or smaller.
Experiment: Try different blocks to see how they affect your sprite’s appearance.
Sequence Blocks: Place them before or after motion blocks to create animated effects.
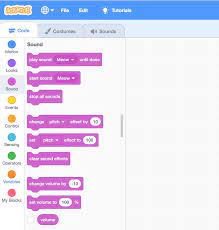
Sound blocks add sound effects or music to your sprite’s actions.
How to Use:
Choose a Sound Block: Such as “play sound ‘meow'”.
Upload or Record Sounds: You can use pre-loaded sounds or upload your own.
Control Sound: Adjust volume, play sounds in a loop, or stop sounds.
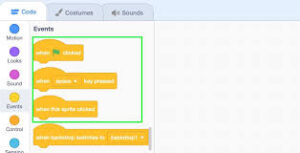
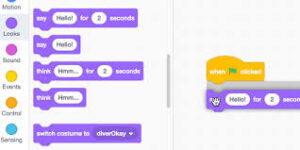
These blocks trigger your sprite’s actions. They act as the starting point for scripts.
How to Use:
Pick an Event Block: Commonly “when green flag clicked”.
Attach Other Blocks: Snap motion, looks, or sound blocks underneath to define what happens when the event occurs.
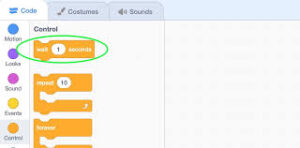
Control blocks introduce logic and control to your sprite’s behavior. These are crucial for making games or interactive stories.
How to Use:
Use Loops: For repeated actions, use blocks like “repeat 10 times”.
Conditional Statements: Use “if-then” blocks to make decisions.
Sequence Actions: Combine with other block types for controlled, logical sequences.
These blocks allow your sprite to react to its environment, like detecting collisions or receiving user input.
How to Use
Detect Interactions: Use blocks like “touching mouse-pointer?”.
React to Inputs: Combine with control blocks to make the sprite respond when it senses certain conditions.
Start Simple: Begin with a single block and see what it does.
Build Complexity: Gradually add more blocks and categories.
Test and Experiment: Click on the blocks to test them live and adjust as needed.
By following these steps and combining different blocks, you can program your sprite to move, react, and interact within your Scratch project, turning simple blocks into engaging animations, stories, and games.
Crafting a unique sprite lends a personal touch to your Scratch project. Here’s a guided tour:
See why Code Galaxy is the #1 online coding
school of choice for students & parents.
Open your preferred web browser and go to the Scratch website. Make sure you’re using a browser that supports Scratch for a seamless experience.
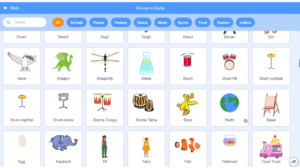
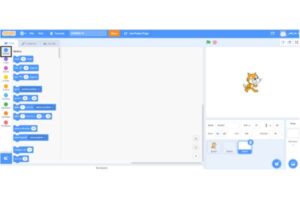
Look at the bottom right of the Scratch editor. You’ll find a row of icons.
Choose a sprite from the library: This is a collection of predefined sprites.
Paint a new sprite: This opens a blank canvas for you to design.
Upload sprite: Use this if you have a sprite image on your device.
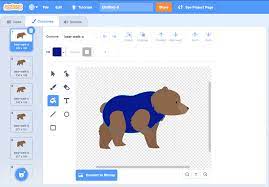
Click on the paintbrush icon. A sprite editor opens up, presenting you with a canvas to channel your creativity.
The sprite editor offers a variety of tools:
Brushes and Pencils: For freehand drawing.
Shapes: If you want geometric figures.
Fill: To quickly color large areas.
Eraser: To correct mistakes.
Colors: A wide palette to pick from, ensuring your sprite stands out.
Layers: You can work in layers, allowing you to add intricate details without altering the base design.
Zoom: If your design is detailed, use the zoom function for precision.
Above the sprite editor, you’ll find a box to type in. Naming your sprite helps in organization, especially if you have multiple sprites in one project. Choose a name that describes its function or appearance. For instance, ‘Hero’, ‘Alien’, or ‘FlyingBird’.
Once you’re satisfied with your design, simply close the sprite editor.
Your newly crafted sprite will now appear on the Scratch stage, waiting for its cues.
If it’s too big or small, or not in the desired starting position, you can manually adjust it on the stage.
By following these detailed steps, even newcomers to Scratch can seamlessly create their custom sprite, adding a personal flair to their projects. Remember, the key is to experiment and let creativity flow. The more you play around, the better you’ll get at designing unique sprites!
Related Reading: What Is A Stage In Scratch?
While sprites are interactive entities, backdrops are static backgrounds that set the stage for your Scratch project.
Absolutely! These are termed “costumes” in Scratch, allowing sprites to change appearance, and aiding in animation.
There’s no set limit, but it’s good practice to maintain an organized stage to ensure your project runs smoothly.
Yes, sprites can interact with each other using sensing blocks. For example, you can program a sprite to react when it touches another sprite.
Projects can be saved directly in your Scratch account. To share, use the ‘Share’ button, which makes your project visible to the Scratch community.
Absolutely! Scratch is a free platform, making it accessible for learners worldwide.
While Scratch itself doesn’t support direct conversion, there are third-party tools that can convert Scratch projects to other languages like Python or JavaScript.
Scratch is designed primarily for ages 8 to 16. However, its intuitive interface makes it a fun learning tool for any beginner in programming.
Scratch teaches fundamental programming concepts like loops, conditional statements, and variables, which are foundational to all programming languages.
Yes, Scratch offers an offline editor, allowing you to create projects without an internet connection.
Scratch provides a variety of tutorials and starter projects that help new users learn how to use the platform effectively.
Definitely! Parents can create a Scratch Family account, allowing them to oversee their child’s account, projects, and interactions.
You can create animations, games, interactive stories, simulations, and much more on Scratch.
Related Reading: Scratch Coding Tips For Beginners
How to Make a Clicker Game on Scratch
In today’s digital age, programming isn’t just a sought-after skill; it is a doorway to innovation and creativity. Among the various platforms available to aspiring coders, Scratch stands out as a beacon for beginners, especially younger enthusiasts.
Your kids need a platform that offers a delightful merger of education and entertainment to learn effectively. This is where Code Galaxy comes in.
For those who have always dreamt of bringing their imaginative ideas to the forefront—whether it is a whimsical animation, an interactive story, or a dynamic game—our experienced tutors, well-curated courses, and overall learning environment are tailored to make those dreams a reality.
As a Code Galaxy Parent, you aren’t left out either. Your kids stay learning and you stay in the loop with weekly reports to track your child’s progress.
So, why wait? Let your kids dive headfirst into the dynamic and colorful world of Scratch.
Watch in wonder as their thoughts take form and their creativity manifests, one sprite and one block at a time.


See why Code Galaxy is the #1 online coding
school of choice for students & parents.